Rain Bird offers smart sprinklers and an app that can be integrated with your Bell Smart Home service.
Requirements
- A compatible Rain Bird smart sprinkler and app.
The Rain Bird sprinkler system should already be installed, connected to Wi-Fi and configured with schedules and zones in the Rain Bird app. - A subscription to a Bell Smart Home package that supports home automation:
- A compatible Rain Bird smart sprinkler and app.
- Good with an Automation add-on
- Better with an Automation add-on
- Best
Hardware compatibility
The following Rain Bird hardware is compatible for integration with Bell Smart Home.
ESP-TM2 with LNK Wi-Fi module
Compatible ESP-TM2 hardware, such as the one pictured below, have an all-green control plate. If the control plate has multi-coloured buttons, it is not compatible.
ESP-Me (shipped after November 2, 2016) with LNK Wi-Fi module
Compatible ESP-Me hardware will have the LNK Ready icon on the panel. If the controller does not have the icon, it is not compatible.
Note : The ESP-ME3 series are not compatible with Bell Smart Home at this time.
To integrate your Rain Bird Sprinkler system
STEP 1: Enable a Connected Home service in your Rain Bird account.
- Write down or photograph the serial number on the back of the LNK Wi-Fi module.
- On a mobile device, log in to the Rain Bird app.
- Select the controller and touch the Settings icon.
- Touch to expand Connected Home, then touch the toggle switch next to Alarm.com.
- Return to the home page of the Rain Bird app.
STEP 2: Add the Rain Bird controller to your Bell Smart Home service.
- Write down or photograph the serial number on the back of the controller’s Wi-Fi stick.
- Call Bell Smart Home technical support at .
- Let the agent know that you have a compatible Rain Bird sprinkler system and would like to add the Rain Bird controller to your Bell Smart Home service.
- The agent will add the equipment to your account.
If you have more than one Rain Bird controller, agent will need to repeat this process for each controller.
To view and control irrigation on your Bell Smart Home app
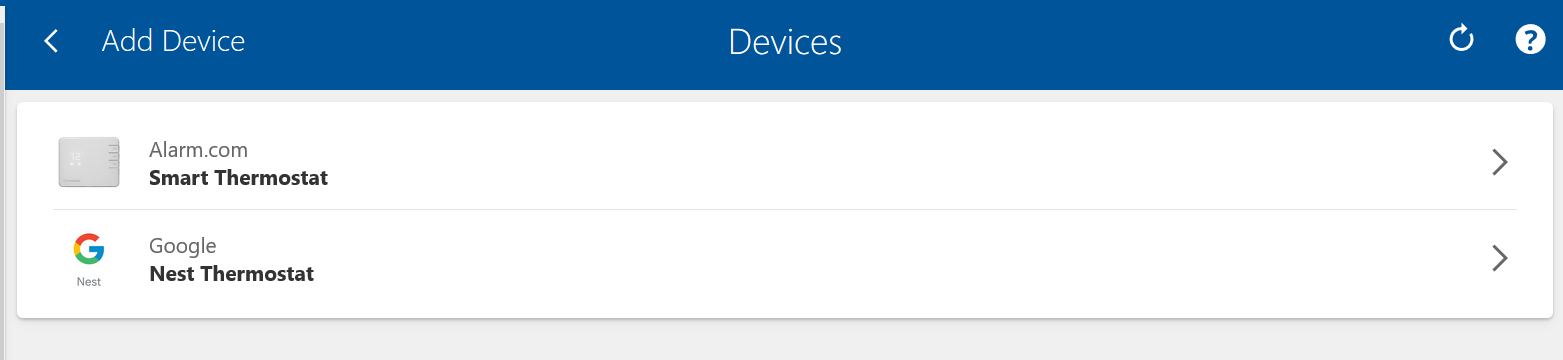
You can use your Bell Smart Home app to view irrigation details.
Irrigation card
The Irrigation card displays the status of your Rain Bird controller: whether it is currently in use or when it was last in use. It also displays if the controller is currently in Rain Delay or has a seasonal adjustment.
Irrigation feature screen
- Set Rain Bird to Rain Delay.
- Start or stop watering an individual zone.
- View the last time each zone was watered.
Tips for use
- Zones are named numerically. To update the zone namesfrom the Bell Smart Home website, click Settings and then Devices.
- When watering, it is not possible to interact with any other zone or program. To make changes, touch Stop Watering.
- To water select zones that are not in a program, touch Water All Zones and deselect zones as desired.
- Program names are visible in the Alarm.com app, but the program details, including zones and duration, are only available in the Rain Bird app. Give each program a descriptive name for easy reference.
You can easily pair and integrate a Google Nest thermostat with your Bell Smart Home system.
Requirements
- Google Nest thermostat (installed) and app
- A subscription to a Bell Smart Home package that supports home automation:
- Video and Automation
- Good with an Automation add-on
- Better with an Automation add-on
- Best
Bell Smart Home features available with Nest integration
- Current target temperature control
- Current mode control (e.g., heat, cool)
- Scene thermostat control including:
- Temperature control
- Mode control
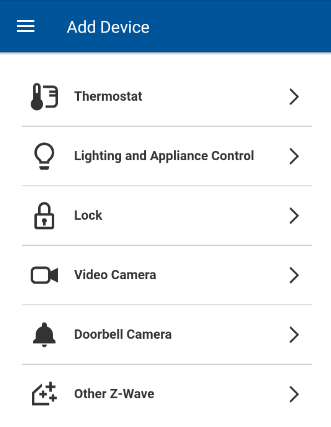
To add a Nest thermostat
Using the app
- Log in to the app.
- Touch
 .
. - Touch + Add Device.
- Touch Thermostat.
- Touch Google Nest Thermostat.
- Touch Next.
- Log in with your primary Google account.
Using the website
- Log in to bell.ca/smarthomelogin.
- Click Settings.
- Click Manage Devices.
- Click Add Device.
- Click Thermostat.

- Click Google Nest Thermostat.
- Click NEXT.
- Log in with your primary Google account.
Note: Google Nest allows multiple logins. If you don’t log in with your primary Google account, a message will pop up that you can only connect with Google Nest Thermostat to homes you own.
After the authorization is complete, allow a few minutes for initialization. You can now control the Nest thermostat using the Bell Smart Home app and website.
If you have any issues during this pairing process, or are unable to complete it, please Contact us
Nest schedules and automation
All thermostat schedules and settings must be configured using Nest.
The Nest integration with Bell Smart Home allows you to control the target temperature, thermostat mode and fan mode. The Nest integration does not support Bell Smart Home rule-based automation, website-programmed thermostat or fan schedules, battery-level reporting, or advanced configuration settings. If you are looking for these features, you can purchase a smart thermostat from Bell Smart Home, please Contact us
Nest Eco mode display within Bell Smart Home
If set up, the local Nest thermostat automatically switches to Eco mode after it senses that nobody is home. This feature is not supported in the Bell Smart Home system. When a Nest thermostat is in Eco mode, it appears as off on the Bell Smart Home website and app. To exit Eco mode, change the thermostat’s mode to Heat, Cool or Auto. Eco mode cannot be selected from the Bell Smart Home website or app.
You can use your Apple Watch to view and control your Bell Smart Home service.
Requirements
- Apple Watch
- Bell Smart Home app
- A subscription to one of the following Bell Smart Home packages:
- Video and Automation
- Good
- Better
- Best
Note: Apple Watch functionality is not available with the Bell Smart Home Starter package.
Features
Important : You must be logged in to the Bell Smart Home app on your phone to use the app on your Apple Watch.
The Bell Smart Home app for Apple Watch includes features like:
- Arm or disarm the system
- Send Scene commands
- Control locks
- Control garage doors
- Control thermostats
- Control lights
- Glance view for a quick overview of the system's status
- Actionable notifications that allow you to respond to certain notifications directly from Apple Watch
How to set up Bell Smart Home on your Apple Watch
When you first set up your Apple Watch, you will have the option to automatically add all available Apple Watch apps already on your iPhone, or you can manage which ones you install manually via the Apple Watch app.
- Open the Apple Watch app on your iPhone.
- Touch My Watch to access the settings section.
- Scroll down to the list of apps on your iPhone that are compatible with Apple Watch.
- Touch the Install button on Smart Home app to add to Apple Watch.
- Once the Smart Home app is installed, it will be listed in the Installed on Apple Watch section.
- Touch the Smart Home app and toggle Show App on Apple Watch to the ON position.
On Apple Watch, you will see a message prompting you to install the app. Select Yes.
Lutron offers four residential home control solutions that can be integrated with your Bell Smart Home service:
- Caséta Wireless
- RA2 Select
- RadioRA 2
- HomeWorks QS
Requirements
- A compatible Lutron system (listed above)
- A subscription to a Bell Smart Home package that supports home automation:
- Video and Automation
- Good with an Automation add-on
- Better with an Automation add-on
- Best
Features available through a Bell Smart Home integration with Lutron
- Plug-in switch and dimmer control
- In-wall switch and dimmer control
- Light schedules
- Individual shade control (Venetians coming soon)
Can rules and schedules for Z-Wave lights be created with a Lutron system?
Yes. You can use the rules and schedules available for Z-Wave lights, including geo-fence, with one exception: the rule that turns a light on when a doorbell camera button is pressed or senses motion. However, rules or schedules for Lutron devices must be created separately from those already created for Z-Wave lights. You need to select Lutron devices when creating these rules or schedules. Additional scene and rule options are available through the Lutron software.
Note : If you are using the Video Analytics feature with Lutron lights on Bell Smart Home cameras, you will not be able to set up light automation rules (e.g., turning on the lights when activity is detected on your video camera) for those lights.
How many Lutron devices can be integrated with Bell Smart Home?
Bell Smart Home can integrate as many devices as the Lutron platform allows.
Integrating your Lutron system
The steps that you need to follow to integrate your Lutron system with Bell Smart Home vary depending on the Lutron system that you have.
A. Caséta and RA2 Select
To integrate Lutron Caséta or Lutron RA2 Select, you must configure the devices using the Lutron app, register the Lutron account with Alarm.com and add the devices using the Add Device portal.
Prerequisites
- Lutron app. Download it from your mobile device’s app store.
- Caséta wireless or RA2 Select main repeater
To register your Lutron account
Using the Bell Smart Home website
- Log in to Bell Smart Home.
- On the left menu, click Settings.
- Click + Add Device.

- Click Lighting and Appliance Control.

- Click Caseta Pro/RA2 Select Main Repeater.
- Click Begin Installation.
- Enter the email address and password associated with the Lutron account and click Sign In.
- Click Authorize.
Using the Bell Smart Home app
- Log in to the app.
- Touch
 .
. - Touch + Add Device.
- Touch Lighting and Appliance Control.
- Touch Lutron Caseta Pro/RA2 Select Main Repeater.
- Touch Begin Installation.
- Enter the email address and password associated with the Lutron account and touch Sign In.
- Click Authorize.
B. RadioRA 2 and HomeWorks QS
Prerequisites
One of the following:
- RadioRA 2 main repeater with firmware version 6.1.0 or higher
- HomeWorks QS processor with firmware version 5.1.0 or higher
To integrate your Lutron system
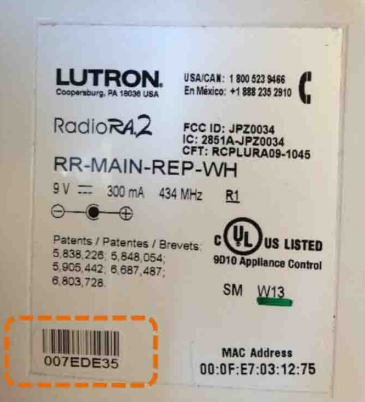
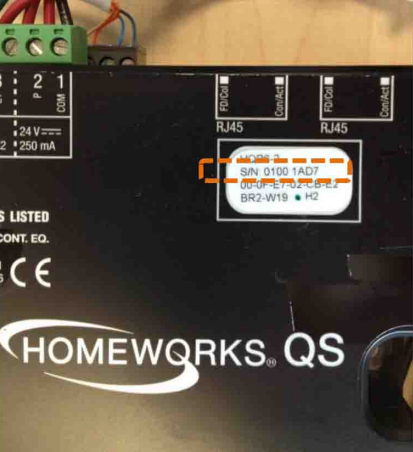
- Note the serial number for your Lutron device.
RadioRA 2 main repeater :
HomeWorks QS processor
- Contact us to advise
- Let the agent know that you have a Lutron RadioRA 2 or a Lutron HomeWorks QS system and would like to add the Lutron repeater to your Bell Smart Home service.
- The agent will add the equipment to your account.
Rachio offers a smart sprinkler controller and app that can be integrated with your Bell Smart Home service.
Requirements
- Rachio smart sprinkler controller and app
The Rachio system should already be installed, connected to Wi-Fi and configured with schedules and zones in the Rachio app - A subscription to a Bell Smart Home package that supports home automation:
- Video and Automation
- Good with an Automation add-on
- Better with an Automation add-on
- Best
To integrate your Rachio controller
- Log in to your Bell Smart Home app.
- In the Irrigation card on the home screen, touch Connect to account.
- Enter your Rachio username and password, and touch Allow Access if asked.
- Wait for the controller to load. The Irrigation card on the home screen will automatically refresh after the authorization is complete.
To view and control irrigation on your Bell Smart Home app
You can use your Bell Smart Home app to view irrigation details.
Note: Irrigation is not yet available on the website.
Irrigation card
The Irrigation card displays the current status of your Rachio controller: whether it is currently in use or when it was last inuse. It also displays if the controller is in Rain Delay or Standby mode.
Note:
- The location of the Irrigation card varies based on enrolled equipment and home screen preferences.
- Last Watered displays the last zone watered, regardless of whether it was watered through a schedule or manually.
Irrigation features
- Set Rachio to Standby or Rain Delay.
- Start watering an individual zone or all zones, or run a schedule.
- View the last time each zone was watered.
Tips for use
- It is not possible to interact with a zone or schedule while watering. Touch Stop Watering before making changes.
- To water zones that are not in a schedule, touch Water All Zones and deselect zones as desired.
- Schedule names are visible in the Bell Smart Home app, but the zones and duration are only available in the Rachio app. Use the Rachio app to give each schedule a descriptive name for easy reference.
- When adding Rachio and Rain Bird systems to the same account, you must add Rachio first.
To change zone names, use the Devices page on the Bell Smart Home website.
Sonos smart speakers can be easily integrated with Bell Smart Home service. Using the Bell Smart Home app, you can control playback on your Sonos speakers.
Requirements
Note : Some music streaming services (e.g., Spotify) require premium memberships to use with Sonos. For more information about which services require a premium membership, refer to the Sonos manufacturer.
- Current versions of the Sonos mobile app and speaker software.
- A compatible device:
- iOS device with firmware version 8.0 or later
- Android device with firmware version 2.1 or later
- Alarm.com mobile app version 4.10.4 or later
- A subscription to a Bell Smart Home package that supports home automation:
- Video and Automation
- Good with an Automation add-on
- Better with an Automation add-on
- Best
Features available through a Bell Smart Home integration with Sonos
- Play audio (e.g., music or playlists) from a list of favourites*
- Control audio playback (e.g., play/pause, adjust volume, mute)
- Play audio on all speakers or speaker groups* (e.g., dining room)
* Launch the Sonos app directly from the Bell Smart Home app for additional controls including audio source selection (e.g., stereo, Spotify, iTunes, etc.), speaker group management, and adding playlists or radio stations to your favourites for playback in the Bell Smart Home app.
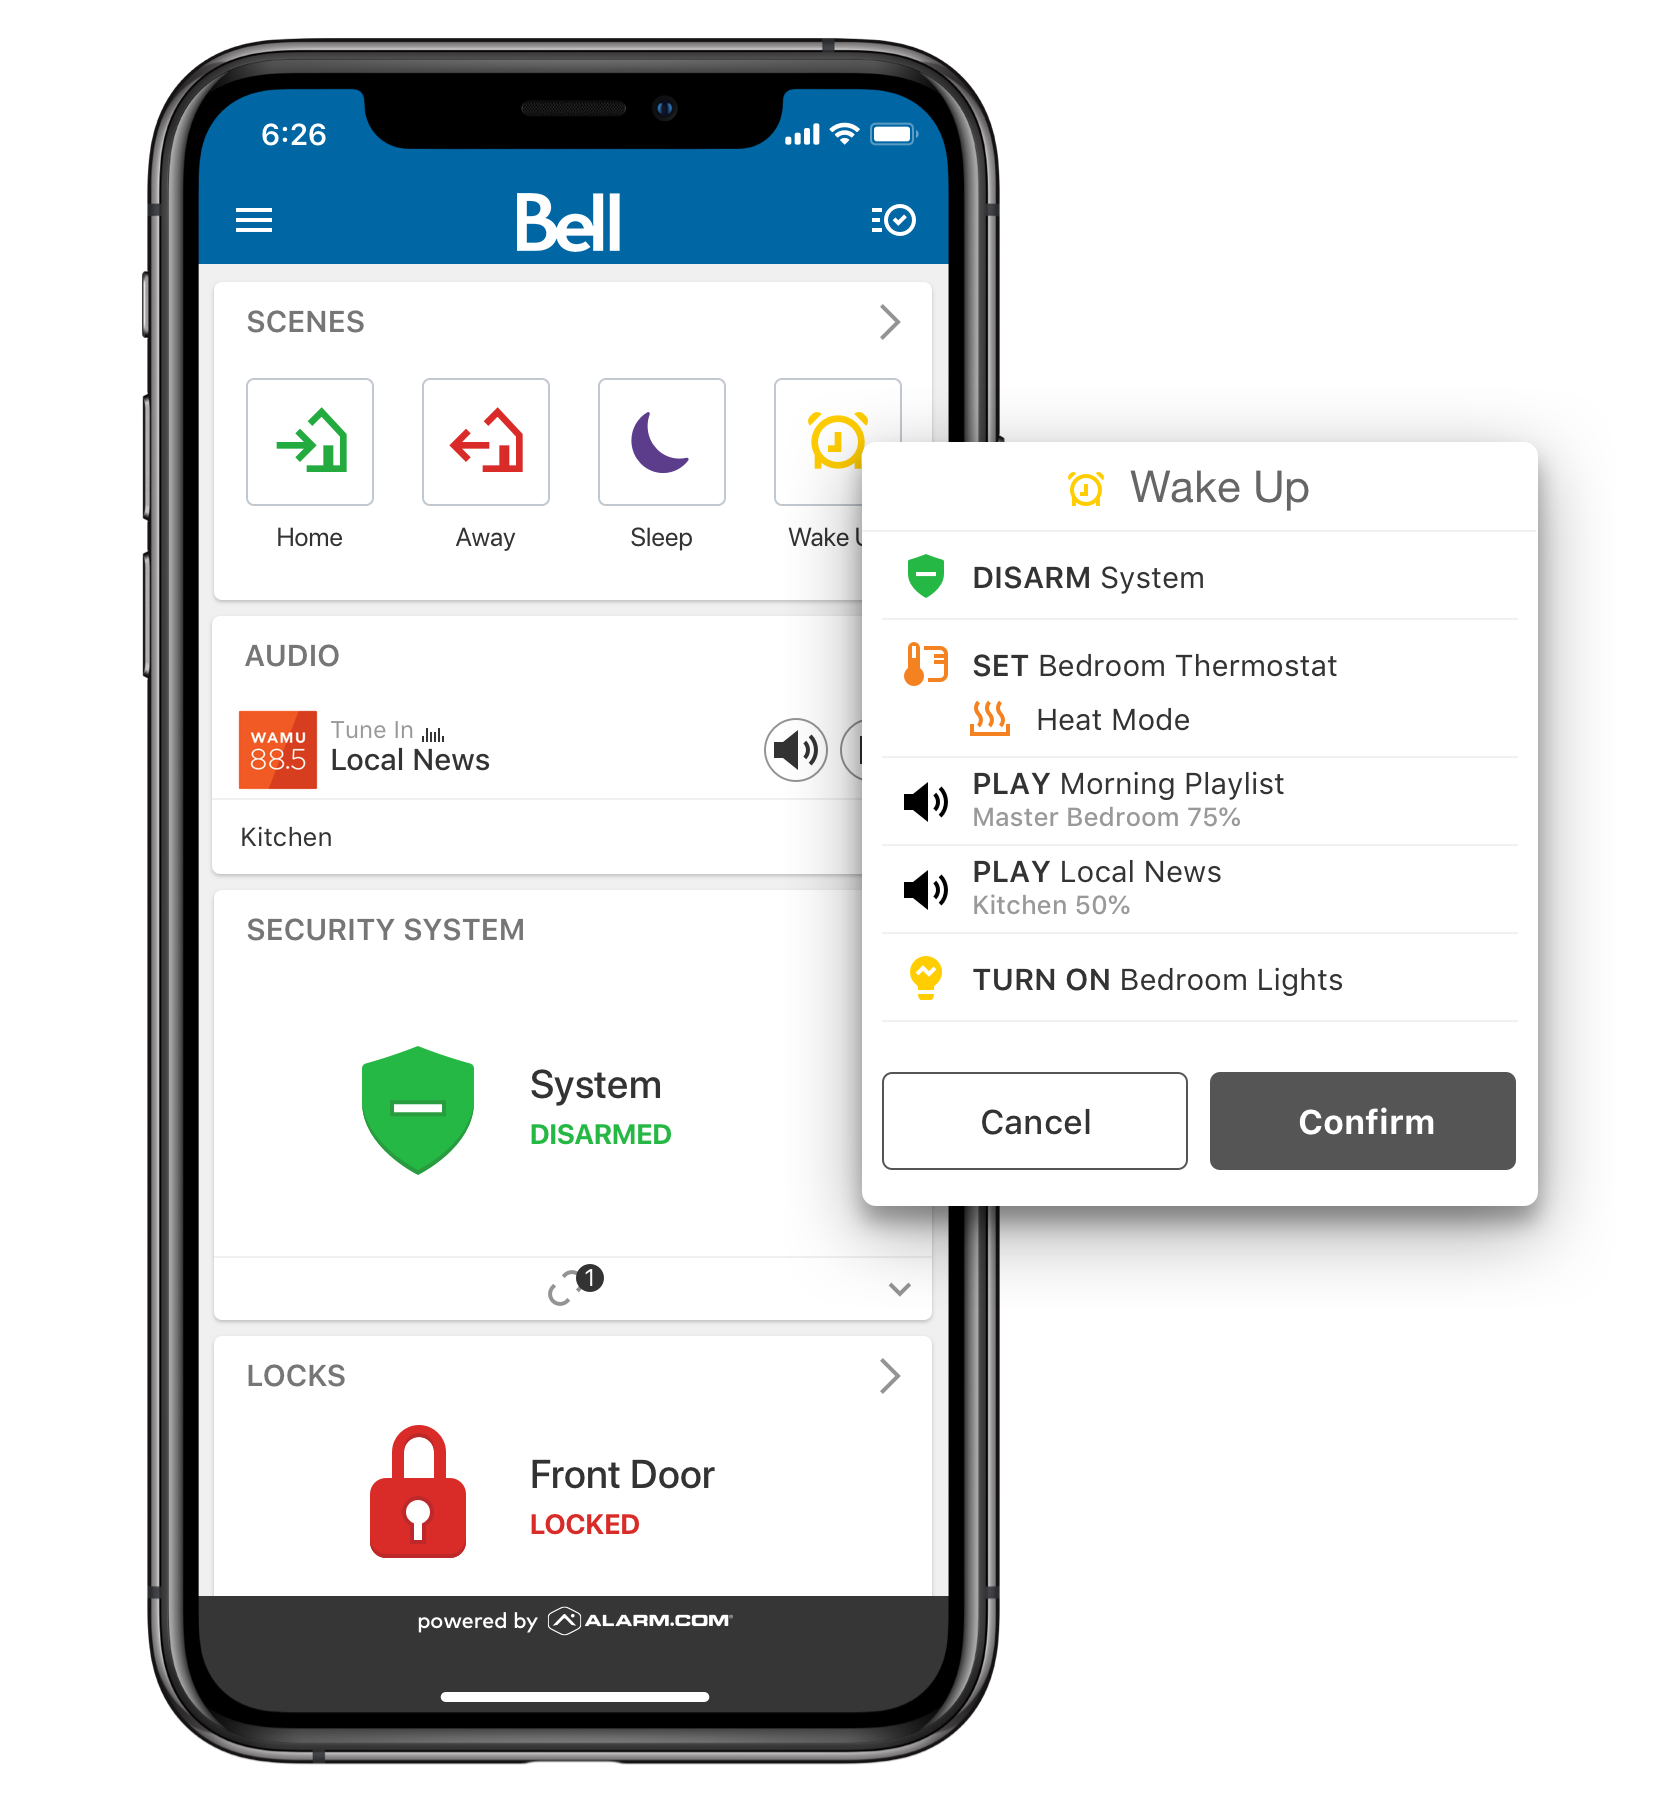
Scenes
It is also possible to incorporate audio into Scenes to combine music, temperature control and lighting to create the perfect ambiance.
To integrate Sonos
If you have any issues during this pairing process, or are unable to complete it, please Contact us
Note: Bell Smart Home accounts only support one Sonos (i.e., account) per household at a time. For information about hardware installation, contact Sonos.
- Log in to your Bell Smart Home app.
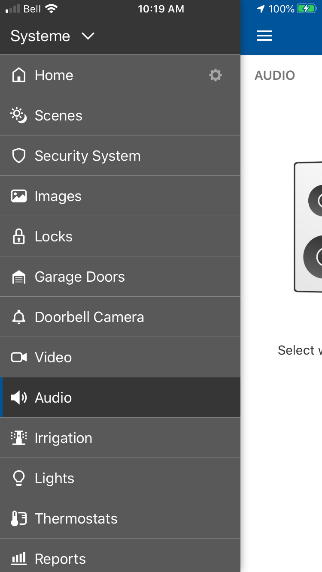
- Touch .
- Touch Audio.
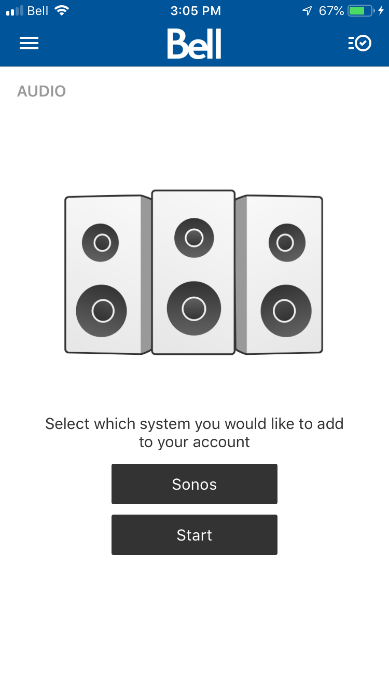
- Using the dropdown menu, select Sonos and touch Start.
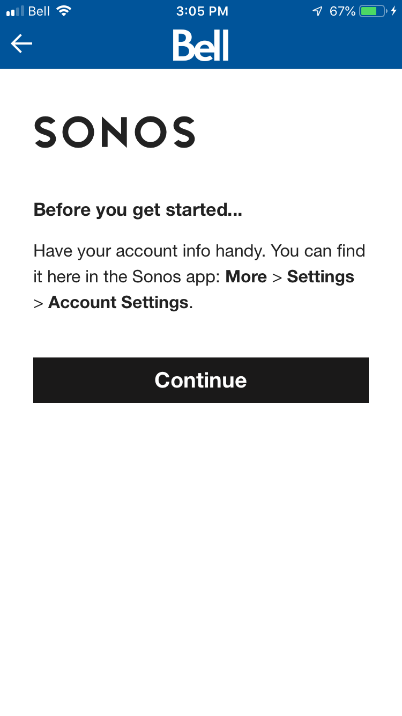
- Touch Continue.
- Enter the Sonos account information and touch Sign In.
Important : It may not be the same username and password as the ones for Bell Smart Home.
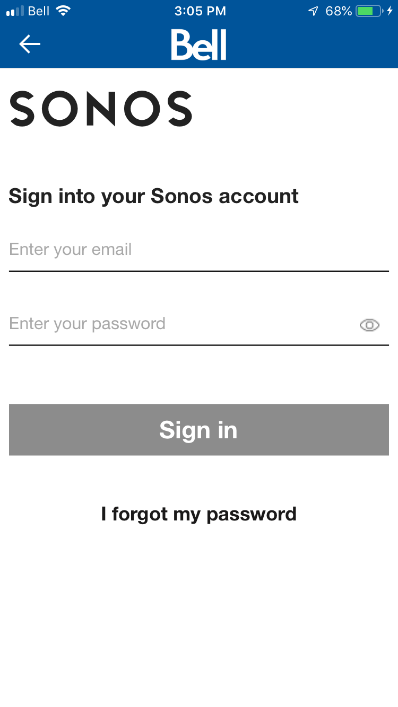
- Touch Okay.
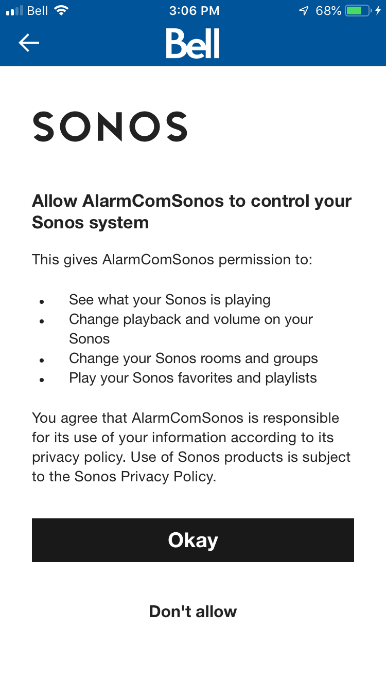
- Follow the onscreen instructions.
To play audio from the Bell Smart Home app
Important : To play audio within the Bell Smart Home app, it must be added to My Sonos (favourites). Once added, audio can be played normally or incorporated into Scenes.
- Log in to your Bell Smart Home app.
- You can play audio from the Audio card on the home screen.

To add favourites in the Sonos app
- Log in to the Alarm.com app.
- Touch .
- Touch Audio.
- Touch
 .
. - Touch Open Sonos App.
- Touch next to any album, song, artist, podcast, etc.
- Touch Add [content] to My Sonos.
- You can play audio from the Audio card on the home screen.
You can easily pair and integrate all Bright smart plugs and lights from The Source with your Bell Smart Home system. Available features include scenes and schedules, on/off control, and light dimming and colour changing (for applicable lighting)
Requirements
- Compatible Bright smart plugs and lights added to the Globe Suite app.
- A Bell Smart Home package that supports automation:
- The Video and Automation package.
- The Good package with an automation add-on.
- The Better package with an automation add-on.
- The Best package.
How to add Bright smart plugs and lights
To add Bright devices, you need to register them with your Globe Suite account.
Note: You can register devices from other manufacturers with Globe Suite but only Bright devices are compatible with Bell Smart Home.
Using the Bell Smart Home app
- Log in to the Bell Smart Home app.
- Touch .
- Touch + Add Device.
- Touch Lighting and Appliance Control.
- Touch Globe Electric Bright Smart Devices.
- Touch Next.
- Log in with your primary Globe Suite account (security authentication will be required to complete the set-up).
Using the Bell Smart Home website
- Log in to Bell Smart Home website.
- Click Settings.
- Click Manage Devices.
- Click Add Device.
- Click Lighting and Appliance Control.
- Click Globe Electric Bright Smart Devices.
- Click Next.
- Log in with your primary Globe Suite account (security authentication will be required to complete the set-up).
How to remove Bright smart plugs and lights
Note: These steps will remove all Bright smart plugs and lights from Bell Smart Home. To remove only one device, delete it in the Globe Suite app.
Using the Bell Smart Home app
- Log in to the Bell Smart Home app.
- Touch .
- Touch Manage Devices.
- Touch the three dots next to a Bright device.
- Touch Device Settings.
- At the bottom of the page, touch UNLINK ACCOUNT to remove all Bright devices.
Using the Bell Smart Home website
- Log in to Bell Smart Home website.
- Click Settings.
- Click Manage Devices.
- Click the three dots next to a Bright device.
- Click Device Settings.
- At the bottom of the page, click UNLINK ACCOUNT to remove all Bright devices.