The Add Device wizard in the Bell Smart Home app will walk you through the steps to connect your camera or home automation device to your home network and add the device to your Bell Smart Home service.
To run the Add Device wizard:
- Launch the Bell Smart Home app and log in.
- Touch the menu button on the top-left corner of the screen (3 horizontal lines).
- Select + Add Device and follow the steps.
Note: One of these steps requires you to connect your camera to Wi-Fi. To do so, use the username and password you use to connect to your home Wi-Fi network.
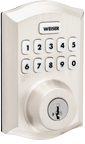
To install your door lock, follow the smart door lock installation instructions.![]()
Add/delete/change door lock codes
With the Bell Smart Home app, you can manage user access settings for your system and locks.
With the Bell Smart Home app, you can:
- View, add and edit which users have access to locks and the security panel
- Create a custom user PIN while on the go
- Select a timeframe for access – at all times, for some of the time or for a limited time
Add a user code using the Bell Smart Home app
- Log in to the app.
- Touch the menu
 .
. - Touch Users.
- Touch the + sign.
- Enter the user's first and last name and then touch Create.
- In Access Code, enter the user's desired code.
- In Device Access, touch to select either:
- Full Access to allow access to all devices on the system. This includes the panel and any locks on the system.
- No Access to block access to all devices on the system. This includes the panel and any locks on the system.
- Toggle the user access to the specified device.
- Touch Save. Allow a few minutes for the new user code to send to the system.
You can also add optional information for the user.
- If the user should only have access to the devices during specific times, touch Time to select the user's access period and then touch Save.
- On the Use Profile page, update any additional information:
- In Contact Information, click + Add Contact to add the user's contact information.
- Touch Language Preference to select the user's language preference and then touch Save.
Replace the battery
Battery type: Four AA batteries
- Remove the screws from the cover (typically one on each side and one on the bottom).
- Remove the cover.
- Pull the black plastic battery tray out from the top.
- Observe the battery orientation.
- Remove the old batteries and dispose of them.
- Install the new batteries. The lock will beep; this is normal.
- Re-insert the battery tray and attach the cover, aligning the lock knob with the pin inside the lock.
- Secure with the screws.
Call technical support at 1 877 267-2001 to confirm the battery replacement was successful and the sensor is in proper working order.
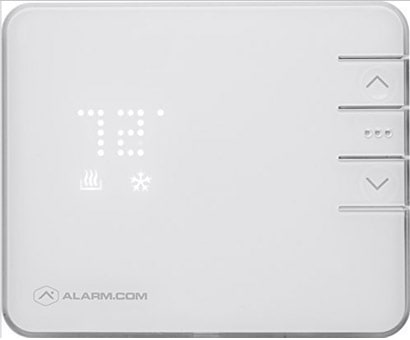
To install your smart thermostat, follow the instructions in the ADC-T2000 Smart Home thermostat user guide. Once completed, make sure you add the device to your Bell Smart Home system.
IMPORTANT: Have a certified heating and cooling specialist or a certified electrician complete the installation steps covered in the manual.
FAQs
Which types of heating and cooling systems is the Bell Smart Home thermostat compatible with?
The Bell Smart Home thermostat is compatible with most types of central heating and cooling systems:
- Furnaces
- Boilers (steam and hot water radiators or radiant in-floor heating)
- Central air conditioners
- Heat pumps
It is not compatible with the following:
- Ductless or mini-split systems
- Electric baseboard heaters
Does the Bell Smart Home thermostat support multistage systems?
Yes. The Bell Smart Home thermostat is compatible with up to three stages of heating and two stages of cooling. For more information, please contact your heating and cooling specialist.
Does the Bell Smart Home thermostat support systems with multiple zones?
Yes, the smart thermostat supports systems with more than one zone. Each zone can be controlled by its own thermostat.
Can the Bell Smart Home thermostat control variable-speed heating and cooling systems?
The smart thermostat can control many variable-speed heating and cooling systems that use standard 24-volt wiring (for example, with R, G, Y, W, C wiring).
My system has an external air baffle for fresh air. Can the Bell Smart Home thermostat work with my system?
The smart thermostat works with heating and cooling systems that have an external air baffle, where the central system controls the baffle.
Some systems rely on the thermostat itself (not the central heating and cooling system) to control the baffle. The smart thermostat will be able to support these systems using the Z terminal.
What can the Z terminal on the Bell Smart Home thermostat be used to control?
The Z terminal of the smart thermostat can currently control a third heating stage, a humidifier or a dehumidifier.
To connect a smart light bulb, light dimmer or appliance module to your Bell Smart Home service, simply install the device and then add it to your Bell Smart Home system.
Installation guides
Installation guides
- Nortek GoControl lamp dimmer
- Nortek GoControl appliance module
- Nortek GoControl smart dimmer
- Nortek GoControl smart plug
- JASCO smart dimmer
- JASCO smart plug
- JASCO smart light bulb
- JASCO smart dimmer
- JASCO smart plug
- JASCO smart light bulb
- Jasco In-Wall Z-Wave Smart Dimmer 46564
- Jasco In-Wall Z-Wave Smart Switch 46562
- Jasco In-Wall Z-Wave Add-on Switch 46560
- Jasco In-Wall Z-Wave Smart Outlet 14315
Create rules
You can create rules triggered by events such as an alarm going off, arming or disarming the alarm system, or activity captured by a sensor or a camera. Using geo-fencing, you can even create a rule to turn on, turn off or dim lights when you walk into your home (if applicable).
To create an event-triggered rule:
- Log in to the Smart Home website.
- Click Automation.
- In Rules, click + Add New Rule.
- Click Event-triggered Rule.
- Configure the rule as desired.
- Click Save.
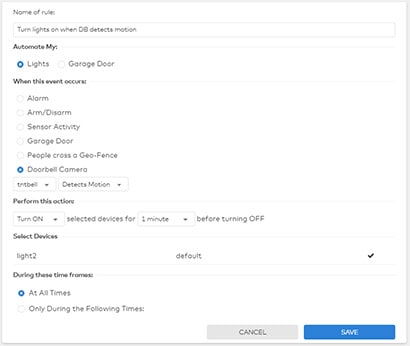
In the following event-triggered rule example, a light is turned on every time the doorbell camera detects motion.
Create a schedule
Scheduled automation allows you to turn on, turn off or dim (if applicable) smart light bulbs, lamp dimmers and appliance modules at specific times.
Note: If a light dimmer is programmed to turn on lights, they’ll light up at the most recently used dimming level.
To create an automation schedule:
- Log in to the Smart Home website.
- Click Automation.
- Click Schedules.
- Click + Add New Schedule.
- Click Light Schedule (if applicable).
- Configure the rule as desired.
- Click Save.
In the following example, a light is turned off at 10:30 p.m. Monday to Friday.
