For guidance, follow the detailed step-by-step instructions.
What you need before you start
- You need a Bell Aliant email address and password. If you do not know your email address or password, please contact us.
-
Follow these easy steps
- Launch the Outlook 2013.
- In the Microsoft Outlook 2013 Startup Wizard, click Next. (If the wizard does not open, click File and then Add Account. Click Yes and then Next.)
- Click Manual Setup or additional server types.
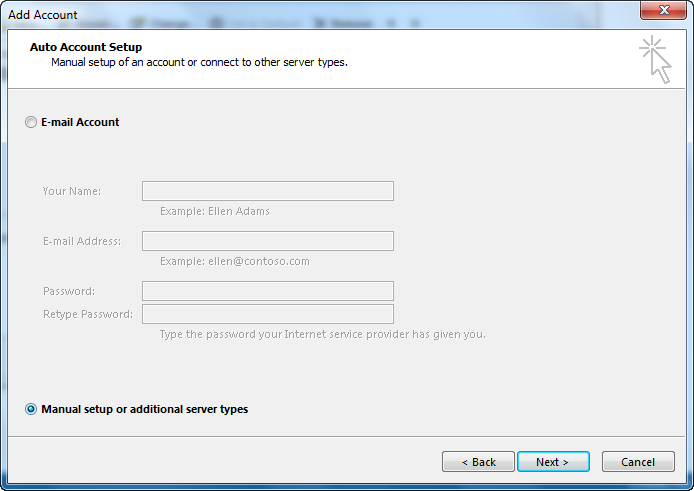
- Click Next.
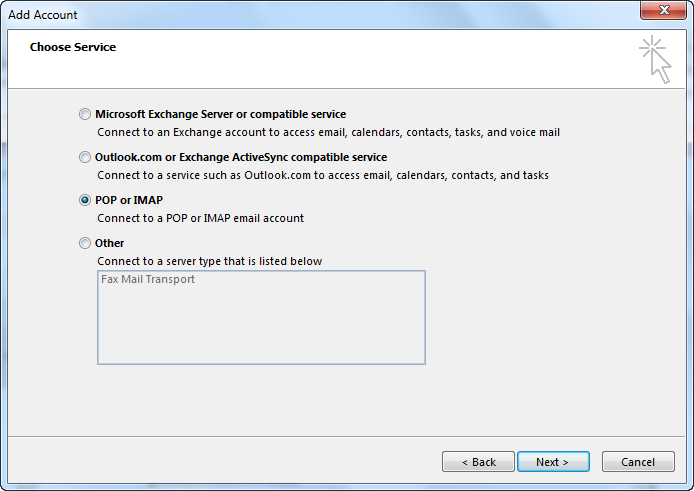
- Click Pop or IMAP and click Next.
- Under User information enter the following:
- Your name: The name you want to display on your outgoing emails.
- Email address: Your Bell Aliant email address (example [email protected]).
- Account type: Select IMAP
- Incoming mail server: Enter imap.bellaliant.net (Note, this setting is good for all Bell Aliant email addresses including nbnet, sympatico, warp)
- Outgoing mail server: Enter smtpa.bellaliant.net(Note, this setting is good for all Bell Aliant email addresses including nbnet, sympatico, warp)
- User Name: Enter your Bell Aliant email address
- Password: Enter your Bell Aliant email password. Click remember password to save your email password.
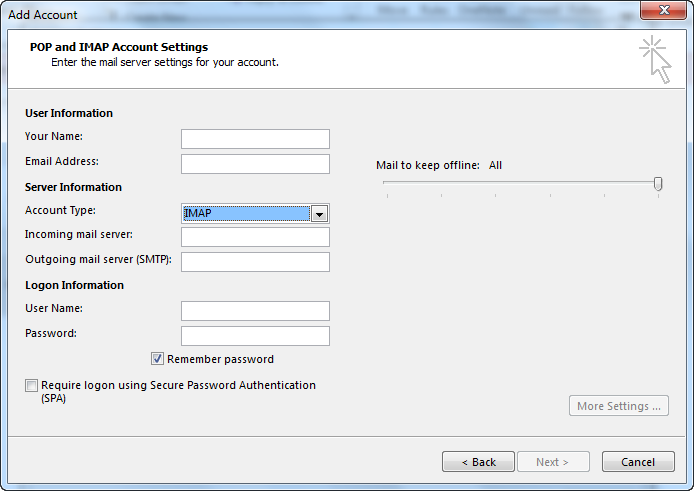
- Click More Settings.
- Click the Outgoing Server tab.
- If the box My outgoing server (SMTP) requires Authentication is not checked, click it.
- If Use same settings as my incoming mail server is not selected, click it.
- Click the Advanced tab and enter the following information:
-
- Incoming server (IMAP) : 143
- Outgoing server (SMTP): 2225
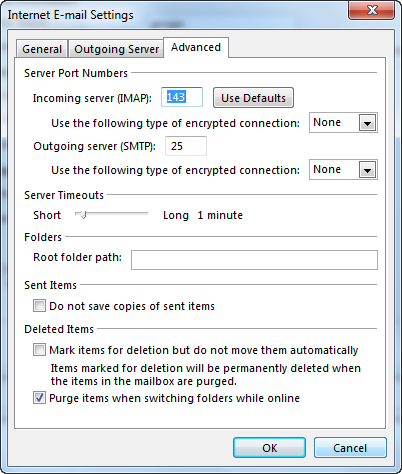
- Click OK.
- Click Next.
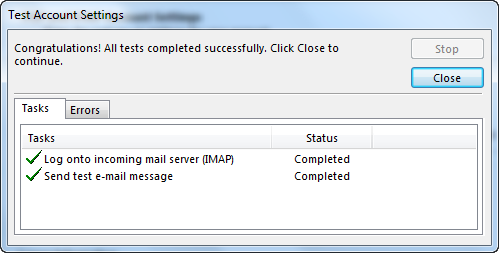
- Outlook 2013 will test your account setup.
- On the Congratulations!All test completed successfully screen, click Close.
- On the You're all set screen, click Finish.
You have successfully configured Outlook 2013 for the first time!