Quick installation guide
Pre-installation checklist:
- Streaming video recorder (included)
- AC power adapter (included)
- High-speed Internet (DSL, fibre optics, cable) connected by Ethernet
- Login information for your Alarm.com service
Installing the streaming video recorder (SVR):
If applicable, please disarm your security system.
- Using an Ethernet cable, connect the SVR to the network.
- Connect the SVR’s AC power adapter and plug it into a non-switched outlet. Wait for the status LED on the front of the SVR to turn solid green.
- Add the SVR to the service. You can either:
- Select the service in MobileTech
- Enter "www.alarm.com/addcamera" in a web browser
- Select the SVR from the video device list. You can also type in its MAC address, which you’ll find on the bottom of the device.
- Follow the on-screen instructions to finish adding the device. You may associate cameras to the device from the website.
FAQs
Can I watch SVR video without an Internet connection?
The SVR must have an Internet connection to stream video from the website or the app.
Can the SVR and the cameras be on different networks?
The ADC-SVR122 must be on the same network as the cameras. Typically this requires the SVR and the cameras to be connected to the same router.
NOTE: If the router is configured as an access point, the ADC-SVR122 and cameras may be able to connect. The SVR will not work if the camera and the SVR are not at the same physical location, connected only over the Internet.
Can video be deleted from the SVR122?
Video that is saved to the SVR122 cannot be manually deleted. This is to ensure that important data isn’t removed from the SVR122. When the hard drives are full, video will be automatically overwritten, a full day at a time, in a first in/first out basis.
Does the ADC-SVR122 support live view from the website and a monitor simultaneously?
The SVR must have an Internet connection to stream video using the website or the app.
You can also watch video without an Internet connection by connecting a monitor to the HDMI port on the SVR. A USB mouse is also required to navigate the local interface.
How do I update the SVR firmware?
To update the firmware on your streaming video recorder:
- Log into bell.ca/smart-home.
- Click Video.
- Click Settings.
- Using the Video Device dropdown menu, select the video device to update.
- Click Video Device Info.
- In Firmware Version, click Update Firmware to send the update to the video device.
How many cameras can the ADC-SVR122 support?
The ADC-SVR122 supports up to eight cameras.
How much video can be stored on the ADC-SVR122?
1 TB of video, which is roughly 20 days of recording with four cameras recording in HD at 30 fps.
With Bell Smart Home video services, you can watch live video from your Bell Smart Home cameras.
Prerequisites:
- A Bell Smart Home video services subscription
- A compatible smartphone with the Bell Smart Home app (for doorbell cameras):
- Android (OS 4.1 or newer): Download the app from the Google Play store.
To watch live video from a computer:
- Click Account login.
- Select Bell Smart Home.
- Enter your login name and password and click Log in.
- On the left menu, click Video (you’ll be in the live video subcategory by default).
- To adjust the size of the image, click on the corresponding layout/size box.
Please note that you can only view the live doorbell camera via the Bell Smart Home app.
To watch live video in the app:
- Launch the Bell Smart Home app and log in.
- Touch the menu button on the top left of the screen (3 horizontal lines).
- For outdoor and indoor cameras:
- Touch the Video button on the menu bar (you’ll be in the live video subcategory by default).
- Touch the play icon on the desired camera to load the live video feed.
- For doorbell cameras:
- Touch the Doorbell camera button on the menu bar (you’ll be in the live video subcategory by default).
- Touch the Start video button on the desired camera to load the live video feed.
Prerequisites:
- A Bell Smart Home video services subscription
- A compatible smartphone with the Bell Smart Home app (for doorbell cameras):
- Android (OS 4.1 or newer): Download the app from the Google Play store.
To view or download saved videos from a computer:
- Visit bell.ca/Smart-Home
- Click Account login.
- Select Bell Smart Home.
- Enter your login name and password and click Log in.
- On the left menu, click Video.
- At the top, click Saved video clips.
- Select a date range in the “From:” and “To:” fields and click Search.
- To download a video clip:
- Move your cursor over a thumbnail and click the checkbox beside Select (you can select multiple video clips).
- Click the Download selected clips button on the top left (the symbol with the down arrow).
- Select the file format from the dropdown menu.
- Click Save. The file will be downloaded to your default browser download folder.
To view or download saved videos in the app:
- Launch the Bell Smart Home app and log in.
- Touch the menu button on the top left of the screen (3 horizontal lines).
- Touch the Video button on the menu bar
- Touch the Saved button on the top right.
- To start playing a saved video, touch a video thumbnail.
- To save a video clip on your device, touch the down arrow on the video playback screen. The video clip will be saved to your device’s default video folder.
You can protect certain clips from being deleted automatically and you can manually delete unnecessary clips.1
Prerequisites:
- A Bell Smart Home video services subscription
- A computer with the latest version of Adobe Flash
- A compatible smartphone with the Bell Smart Home app (for doorbell cameras):
- Android (OS 4.1 or newer): Download the app from the Google Play store.
- Apple (iOS 9.0 or newer): Download the app from the App Store.
To protect or delete video clips from a computer:
- Visit bell.ca/Smart-Home
- Click Account login.
- Select Bell Smart Home.
- Enter your login name and password and click Log in.
- On the left menu, click Video.
- At the top, click Saved video clips.
- Select a date range in the “From:” and “To:” fields and click Search.
- Select a saved video clip: move your cursor over a thumbnail and click the checkbox beside Select (you can select multiple video clips).
- To protect the selected video clips from being automatically deleted, click the Protect selected clips button on the top left (the symbol with the closed lock).
- To delete the selected video clips, click the Delete selected clips. Click DELETE CLIPS on the popup window to confirm.
To protect or delete video clips in the app:
- Launch the Bell Smart Home app and log in.
- Touch the menu button on the top left of the screen (3 horizontal lines).
- Touch the Video button on the menu bar.
- Touch the Saved button on the top right.
- Select the video file(s) by touching the checkbox.
- To protect the selected clips, touch the lock symbol at the top of the page.
- To delete the selected clips, touch the options button (3 dots on the top right of the page) and then touch Delete. Confirm by touching the DELETE button on the popup window.
Please note the options button will only be visible after a clip is selected.
Disclaimer: 1. Deleting a saved video clip does not increase the allotted number of new video uploads per month.
Smart Video adds an intelligent layer of security. Extending beyond motion detection, it knows whether something is a person, animal or vehicle. You can configure Video Analytics rules for each camera to identify the scenarios that will trigger a notification. For instance, you can choose to be notified when a car enters your driveway, but not when a dog walks by. This means more meaningful notifications and fewer unwanted clips.
Bell Smart Home cameras record video clips using two different technologies. Depending on your camera, you may be able to record clips using either Video Analytics or Video Motion Detection (VMD).
With Bell Smart Home video services, you can adjust the sensitivity of motion and the size of the targets captured by your cameras.
To adjust motion detection settings (from a computer only):
- Visit bell.ca/smarthomelogin
- Enter your login name and password and click Log in.
- On the left menu, click Video.
- At the top, click Settings.
- Select a camera from the Video device dropdown menu.
- If Video Analytics is not an option, select Video motion detection. If Video Analytics is an option, please refer to the article Getting started with Video Analytics for Smart Video.
Three VMD windows can be configured. When motion is detected within these windows, it triggers a video clip recording. - Click 1, 2 or 3 to select the corresponding window. Use the mouse cursor to draw the VMD window in the areas where you’re looking to capture motion.
- Adjust the sensitivity of the VMD by selecting from a range of 1 to 10 (10 being the most sensitive). What is sensitivity?
- Adjust the target size of the VMD by selecting from a range of 3% to 30%. What is target size?
- Click Save to save the setting of the current VMD before adjusting a different VMD.
**Please note VMD options do not apply for doorbell cameras.
What is sensitivity?
Sensitivity determines how drastic a change in the view of the camera must be to trigger a clip. For example, a cloud moving slowly across the screen may trigger a video clip if the sensitivity is set high enough, whereas a lower sensitivity may not trigger a recording for the same amount of motion.
Start at a sensitivity of 7 and adjust up/down based on your needs and on what the camera is capturing.
What is target size?
Target size represents a percentage of the area of the VMD window that will cause the camera to trigger a clip. If the target size is set too large, it will only pick up very large objects such as a vehicle. If the target size is set too small, objects such as leaves blowing or small animals will trigger a clip.
You need to adjust the target size based on the location of the VMD. A VMD close to the camera itself will usually require a larger target size compared to a VMD that is at the far from the camera. For example, when you stand at the far end of your driveway, you’ll look smaller than when you’re standing in close proximity to the camera itself.
Best practices of video motion detection
While there is no one perfect setting, as each customer’s scenario is unique, there are some best practices to follow to ensure the best performance.
- Use long narrow boxes to create a “trap zone” where someone is likely to pass by one of the VMD regions.
- Avoid creating boxes that cover the whole screen.
- Avoid overlapping VMD windows.
- Avoid placing VMD windows on trees or bushes as they can move when it’s windy and cause unwanted video clips.
With Bell Smart Home video services, you can control when you want your cameras record.
Prerequisites:
- A Bell Smart Home video services subscription
- A computer with the latest version of Adobe Flash
To adjust motion detection settings (from a computer only):
- Visit bell.ca/Smart-Home
- Click Account login.
- Select Bell Smart Home.
- Enter your login name and password and click Log in.
- On the left menu, click Video.
- At the top, click Recording schedules..
- Select a camera from the Video device dropdown menu.
- Click ADD SCHEDULE.
- Click Video motion detection.
- Select the camera from the dropdown menu.
- Select when you want to the cameras to record:
- At all times to record whenever motion is detected.
- Only during the following times to record whenever motion is detected but only on specific days and times.
- Choose the minimum amount of delay between clip recordings.
For example, if set to 1 minute, the camera will not trigger another clip for at least 1 minute after the last clip, even if it detects motion in that minute. - At home settings can be set up if you do NOT want the camera to record during these three events: Disarmed, Armed Stay and Geo-Devices. If Geo-Devices is selected, the camera will not record when the specific device is within the selected Geo-Fence.
- Click SAVE SCHEDULE.
*Please note: To edit an existing recording schedule, click on the pencil icon beside the existing recording schedule rule.
Doorbell cameras
- Visit bell.ca/Smart-Home
- Click Account login.
- Select Bell Smart Home.
- Enter your login name and password and click Log in.
- On the left menu, click Video.
- At the top, click Recording schedules..
- Select a camera from the Video device dropdown menu.
- Click ADD SCHEDULE.
- Click one of the following:
- Doorbell motion recording schedule will trigger a clip when the camera detects motion.
- Doorbell call recording schedule will trigger a clip if the doorbell camera button is pressed.
- Click SAVE SCHEDULE.
*Please note: To edit an existing recording schedule, click on the pencil icon beside the existing recording schedule rule.
You can pause your recordings should you want to, for example, when you’re hosting a backyard party.
Prerequisites:
- A Bell Smart Home video services subscription
- A computer with the latest version of Adobe Flash
- A compatible smartphone with the Bell Smart Home app:
- Android (OS 4.1 or newer): Download the app from the Google Play store.
- Apple (iOS 9.0 or newer): Download the app from the App Store.
To pause and resume a recording schedule from a computer:
- Visit bell.ca/Smart-Home
- Click Account login.
- Select Bell Smart Home.
- Enter your login name and password and click Log in.
- On the left menu, click Video.
- At the top, click Recording schedules..
- 7. Click the switch to the right of the recording schedule you wish to pause or resume (blue is on, grey is off).
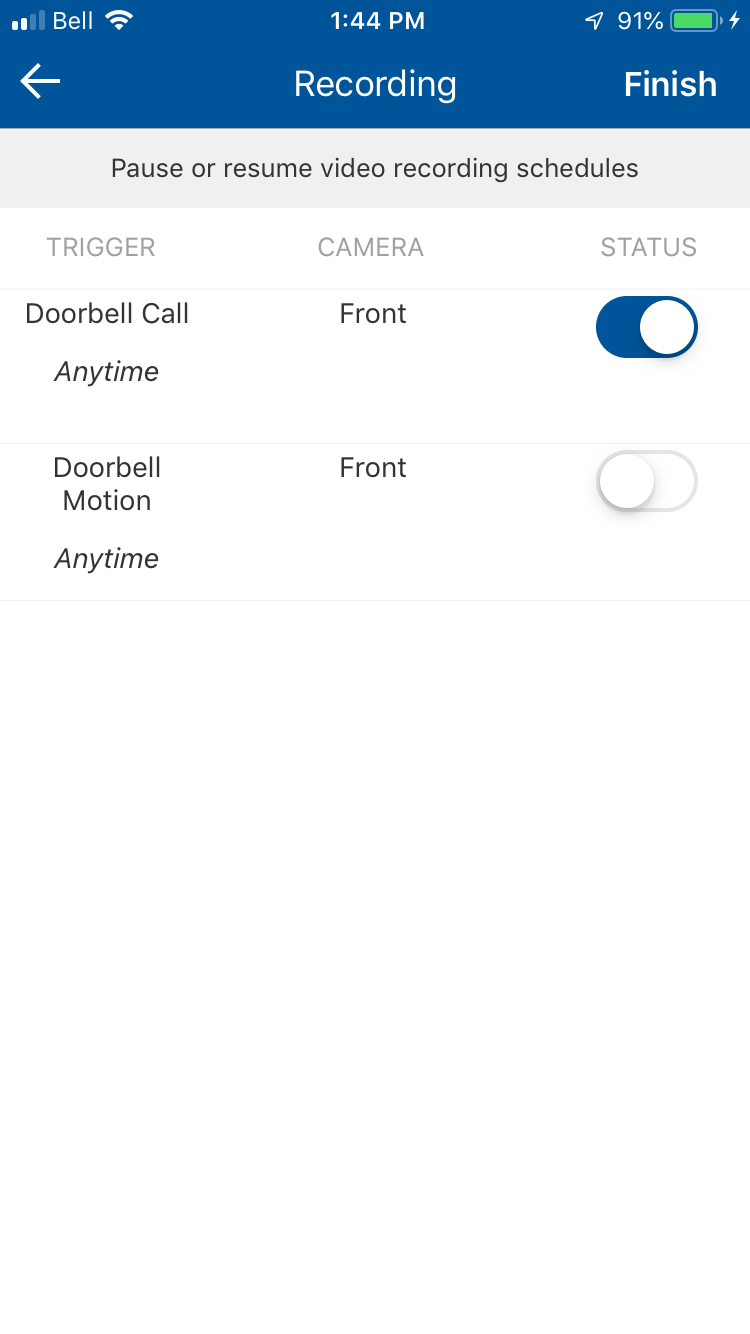
To pause and resume a recording schedule in the app:
- Launch the Bell Smart Home app.
- Touch the menu button on the top left of the screen (3 horizontal lines).
- Touch the Video button on the menu bar.
- Touch the cogwheel (gear icon) on the top right.
- Touch the Pause/Resume recording schedules button to bring up the list of your recording schedules.
- Touch (NOT drag) the switch next to the recording schedule you wish to pause/resume (red is on, grey is off).
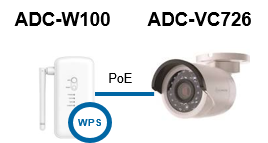
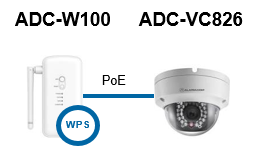
How to reconnect your PoE cameras
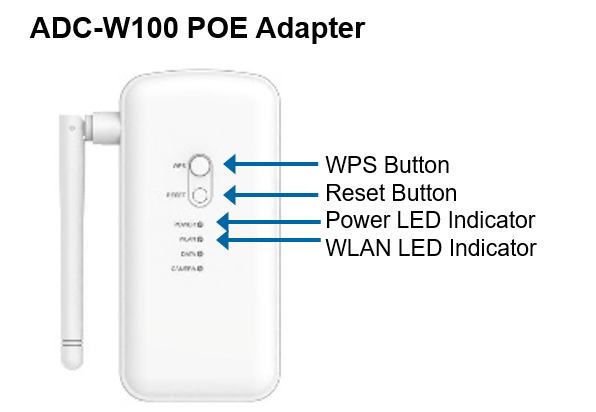
PoE adapter
Before you begin:
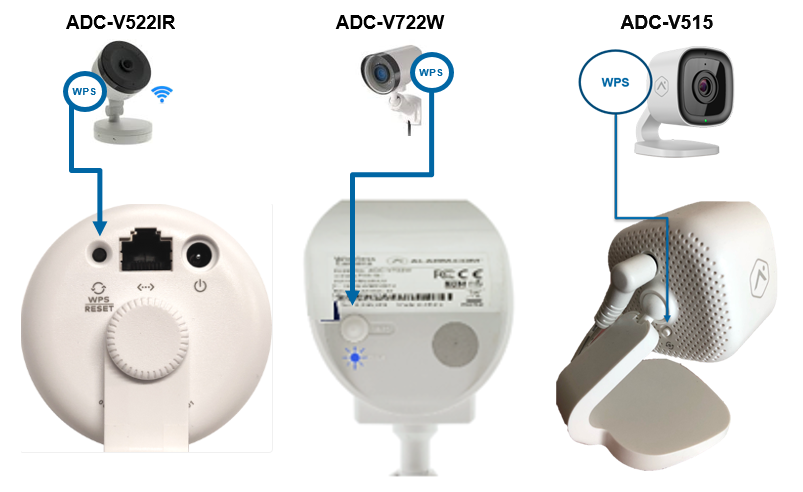
- Confirm your modem has a Wi-Fi Protected Setup (WPS) button. The button may be identified by the
 symbol or it may be simply labelled ‘WPS.’
 - If you can’t find a WPS button, please contact your Internet provider or modem manufacturer to see if your modem has WPS.
- If your modem does not have WPS, please contact Bell Smart Home for assistance.
Follow these steps to reconnect your Qolsys IQ 2 Panel.
Steps
- Find where the PoE adapter (pictured to the left) is plugged in.
- Confirm that the power indicator on front of the PoE device is solid green.
- Press the WPS button for about three seconds and release it when the WLAN indicator begins to flash red.
- Press the WPS button on your modem/router for four to five seconds.
- Allow a few minutes for the PoE adapter/camera to connect with your modem. The WLAN indicator flashes green when the connection is complete. When no data is being sent over Wi-Fi, the light goes to a solid green to indicate it’s connected to Wi-Fi.
- Check the live camera view from the app or the website to confirm that the camera is connected properly.
If the connection process times out (i.e. after two or three minutes) and reverts to a solid red WLAN indicator, the WPS was not successful. Please try again from step 3.
To connect your devices to the Wi-Fi network using WPS, please follow these steps:
- Turn on your wireless device.
- Press the WPS button on your modem for 5 seconds until the WPS light starts blinking (on the Home Hub 3000, you can check its display).
- Within 2 minutes, press and hold the WPS button on your device for 5 seconds.
NOTE: If you do not complete the process in time, you’ll need to restart from step 2. - The password for your primary Wi-Fi network will automatically load into the device and connect to the network.
How to reconnect your indoor and outdoor cameras
Wi-Fi reconnection instructions for cameras directly connected to a modem. Please call support if your camera is connected through a gateway.
Before you begin:
- Confirm your modem has a Wi-Fi Protected Setup (WPS) button. The button may be identified by the symbol or it may be simply labelled ‘WPS.’
- If you can’t find a WPS button, please contact your Internet provider or modem manufacturer to see if your modem has WPS.
- If your modem does not have WPS, please contact Bell Smart Home for assistance.
Follow these steps to reconnect your cameras.
Steps
If possible, try not to change the camera’s orientation while pushing the WPS button. If it points to a different field of view, your video motion detection windows will need to be redrawn.
- With the camera powered on, press the WPS button for two to three seconds and release it when the light flashes blue.
- Press the WPS button on your modem/router for four to five seconds.
- Allow a few minutes for the PoE adapter/camera to connect with your modem: the light on the camera will cycle through the following indicators.
- Solid red
- Blinking green
- Solid green (which indicates that your camera is now connected to your Wi-Fi network)
- Check the live camera view from the app or the website to confirm that the camera is connected properly.
If the connection process times out (i.e. after two or three minutes) and reverts to a solid red WLAN indicator, the WPS was not successful. Please start over.
To connect your devices to the Wi-Fi network using WPS, please follow these steps:
- Turn on your wireless device.
- Press the WPS button on your modem for 5 seconds until the WPS light starts blinking (on the Home Hub 3000, you can check its display).
- Within 2 minutes, press and hold the WPS button on your device for 5 seconds.
NOTE: If you do not complete the process in time, you’ll need to restart from step 2. - The password for your primary Wi-Fi network will automatically load into the device and connect to the network.
How to reconnect your doorbell cameras
Wi-Fi reconnection instructions for cameras directly connected to a modem. Please call support if your camera is connected through a gateway.
Doorbell camera
Follow these steps to reconnect your doorbell camera.
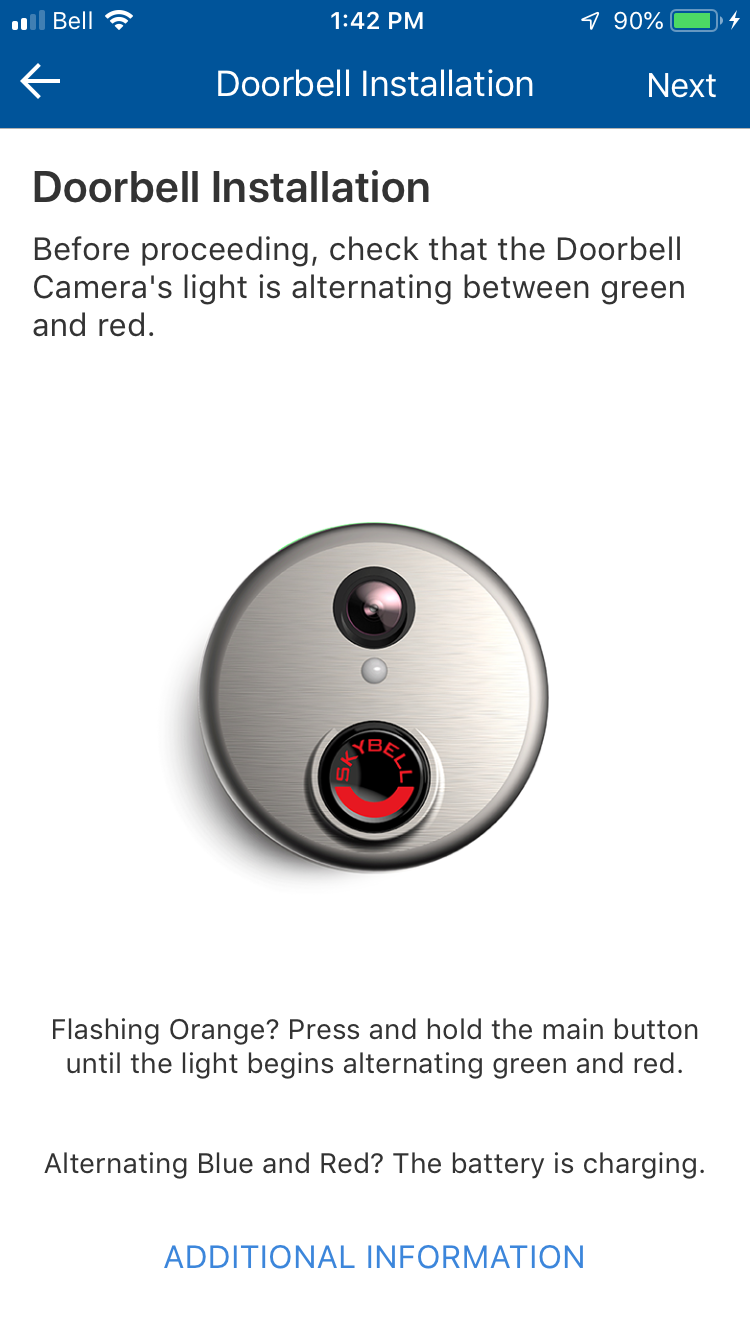
- Press then Doorbell button on the doorbell camera for 60 seconds until the light flashes red and green. Release the button.
- Log into your Bell Smart Home app.
- At the top left of the screen, tap the three vertical bars to open the menu.
- Tap on Doorbell Camera.
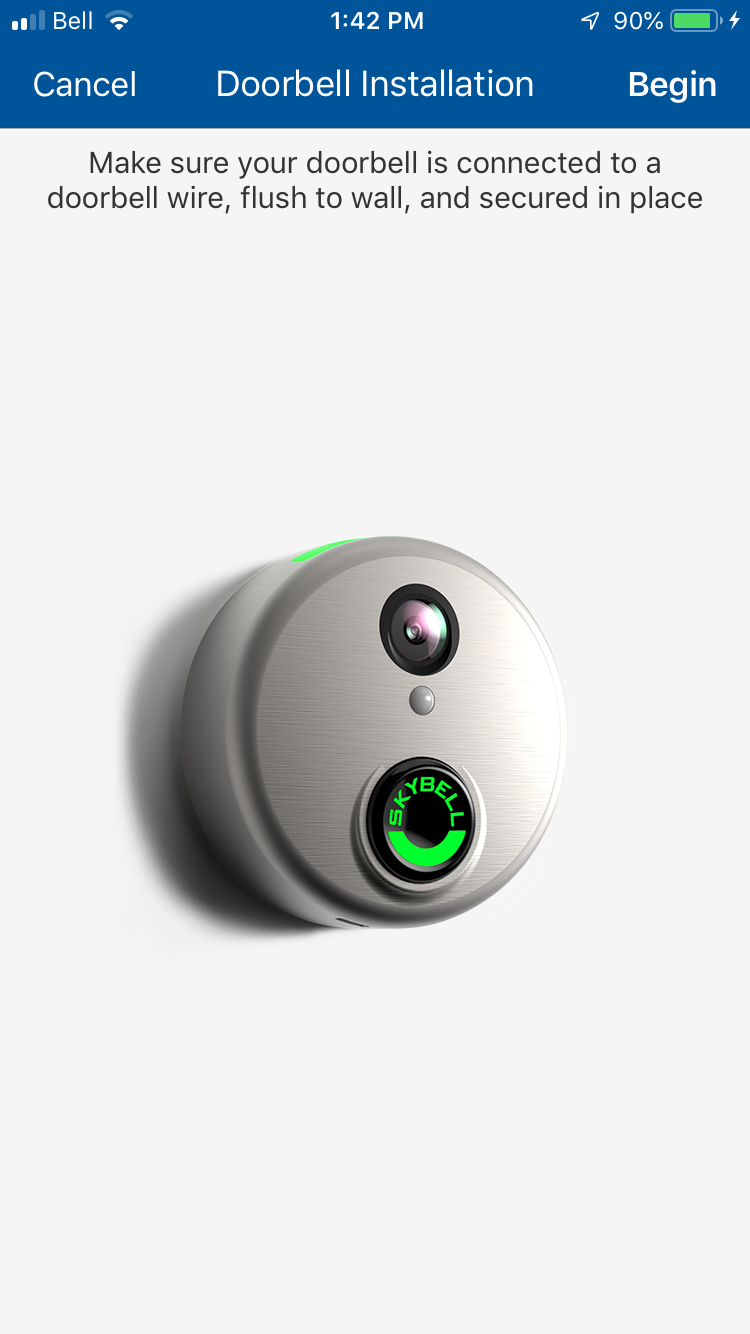
- Tap Begin.
- Tap Next.
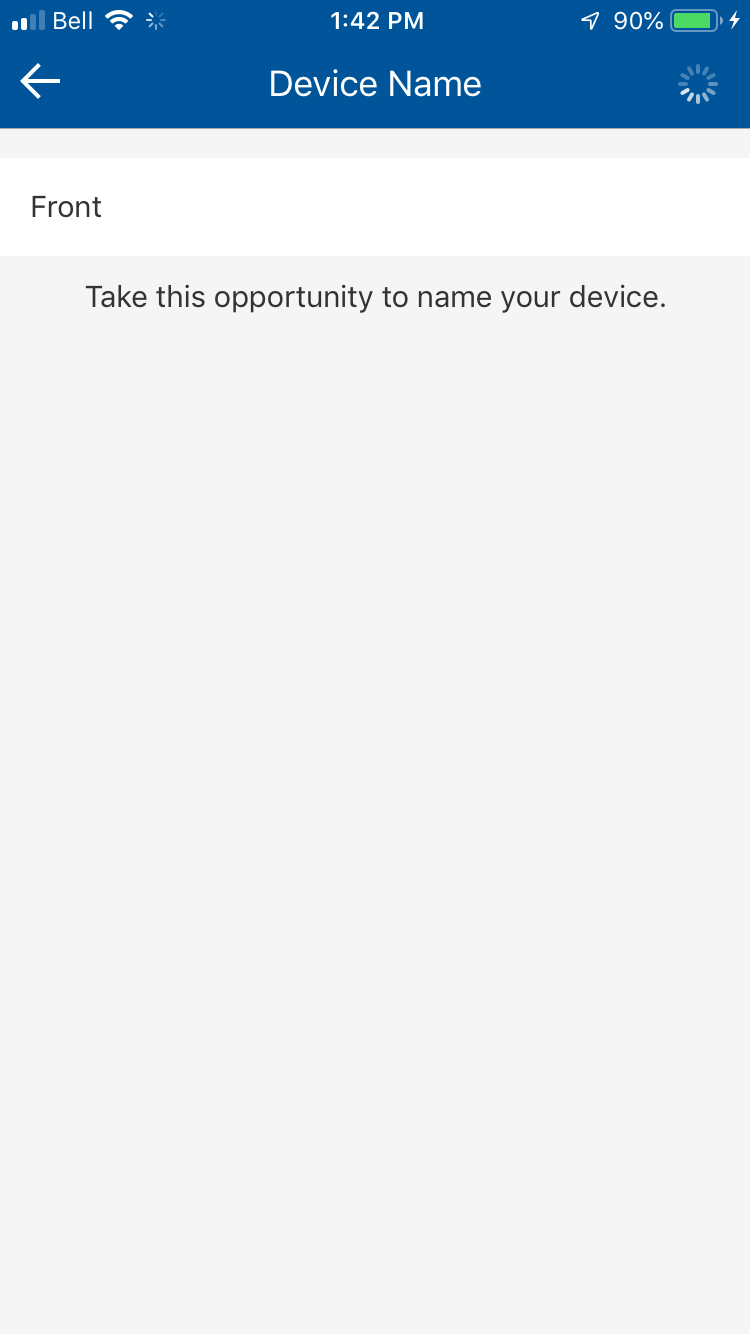
- Enter the camera name and tap Next.
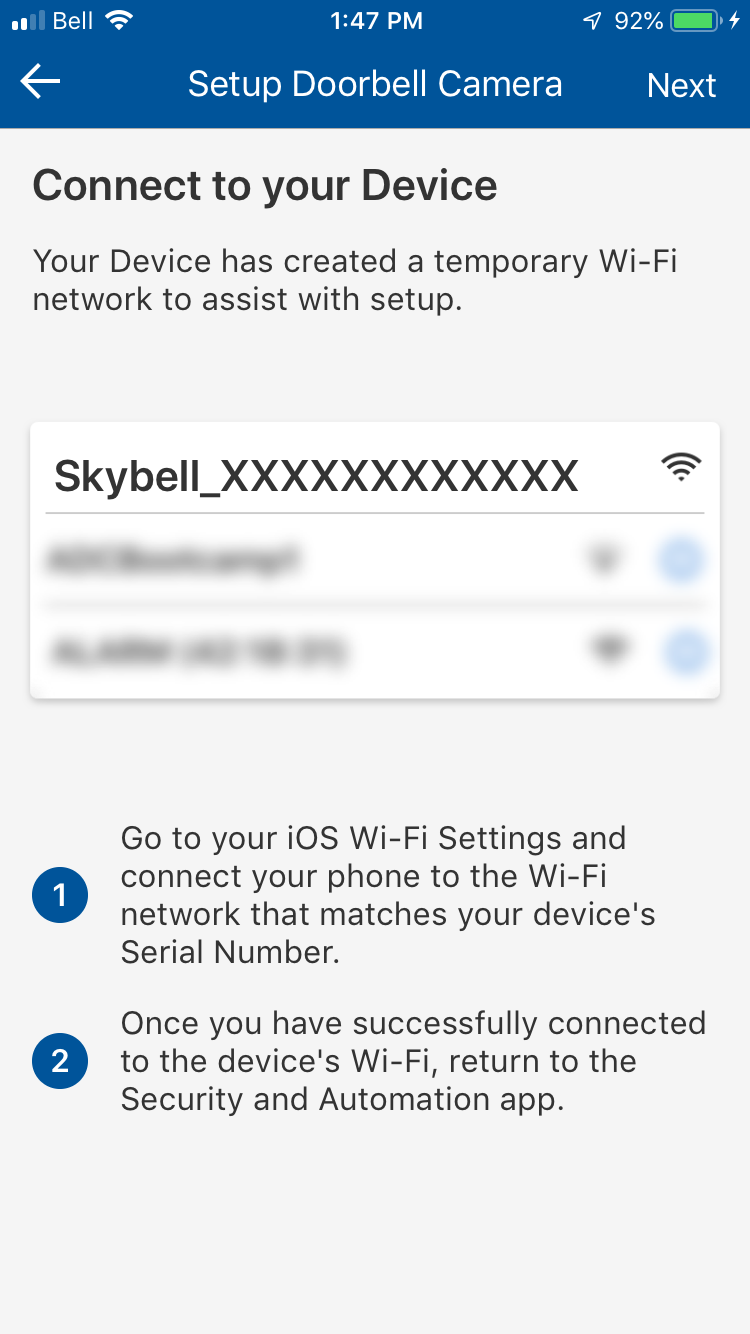
- Close the app and go to your mobile device’s Wi-Fi settings.
- Tap to select the Skybell network.
- Once connected to the Skybell network, go back to your Bell Smart Home app to complete the installation.
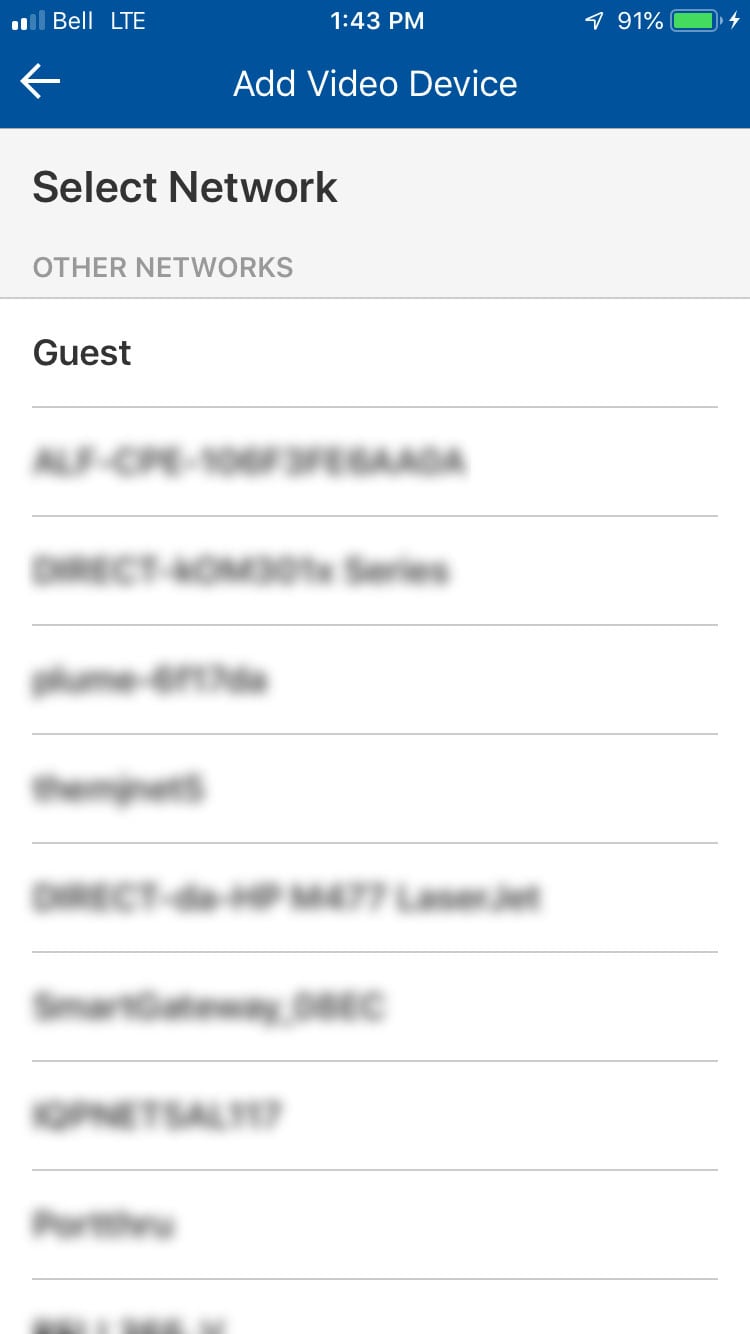
- Tap Next.
- Select the Wi-Fi network that the doorbell camera is on.
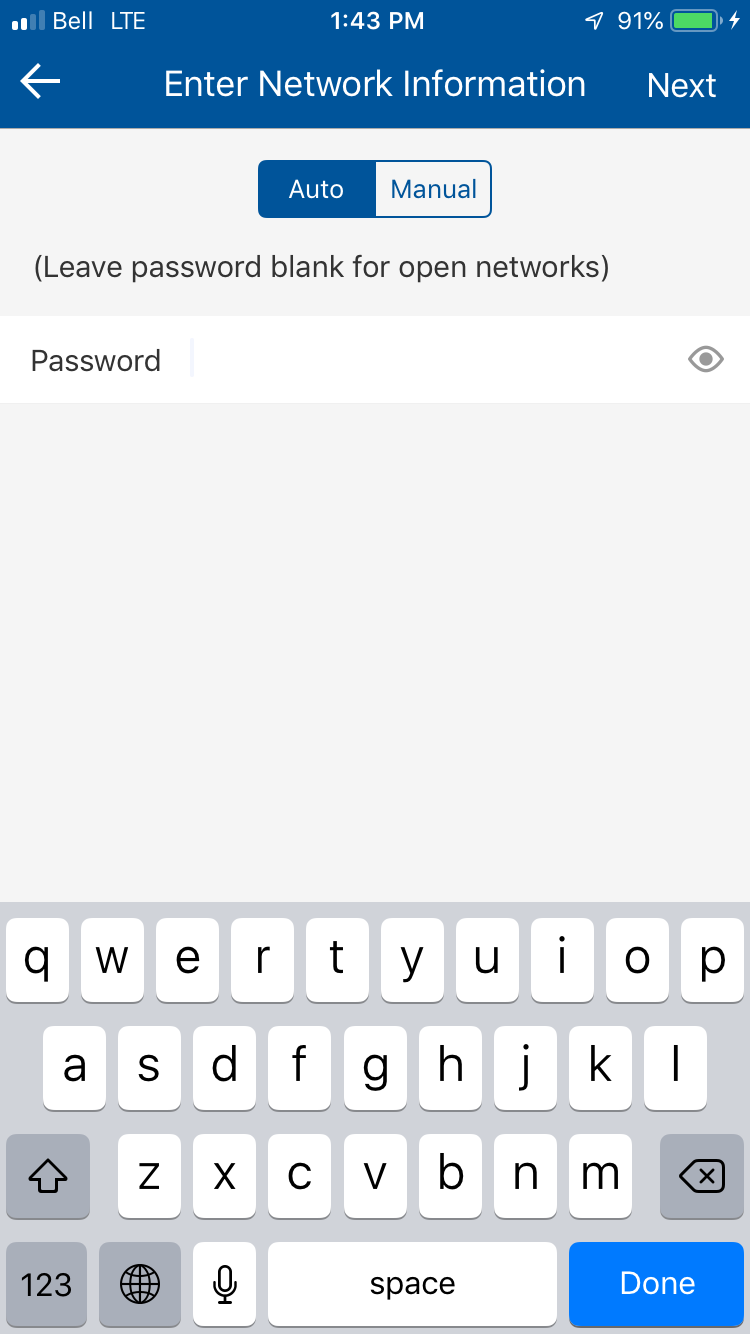
- Enter the Wi-Fi password.
- Tap Done.
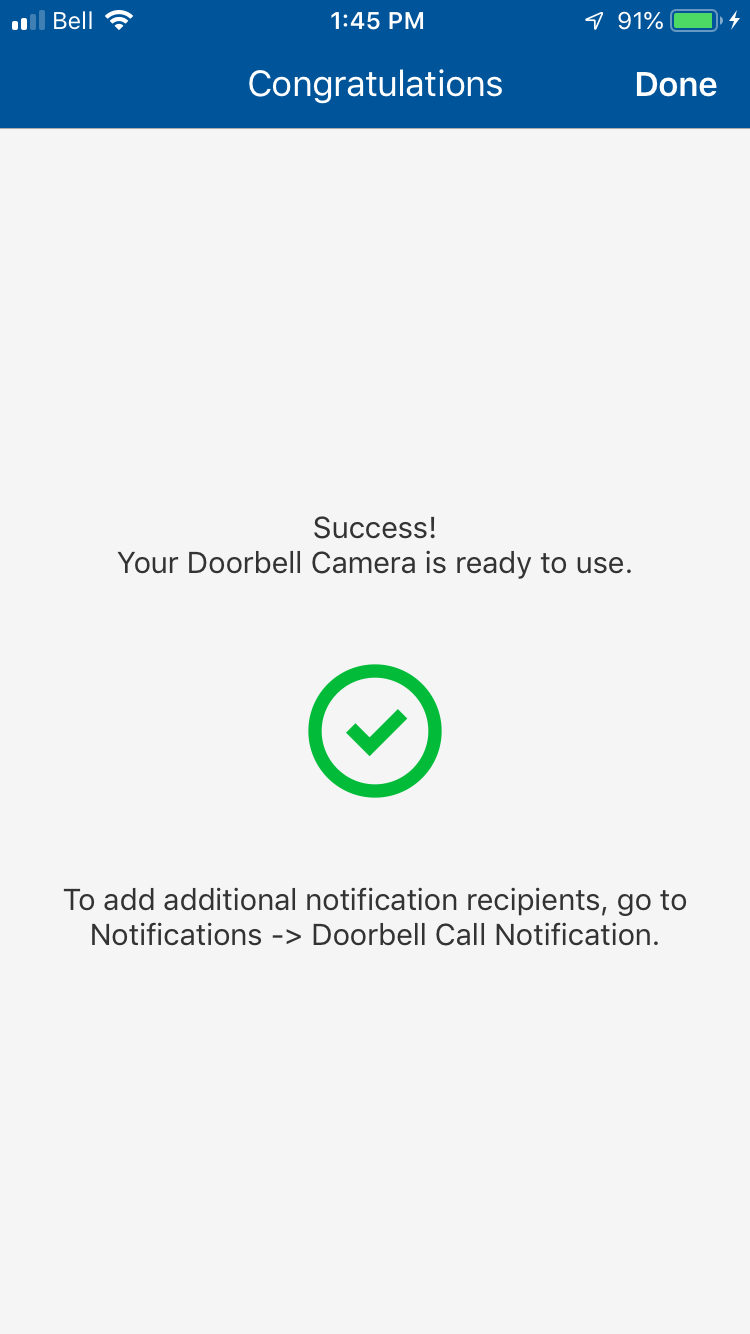
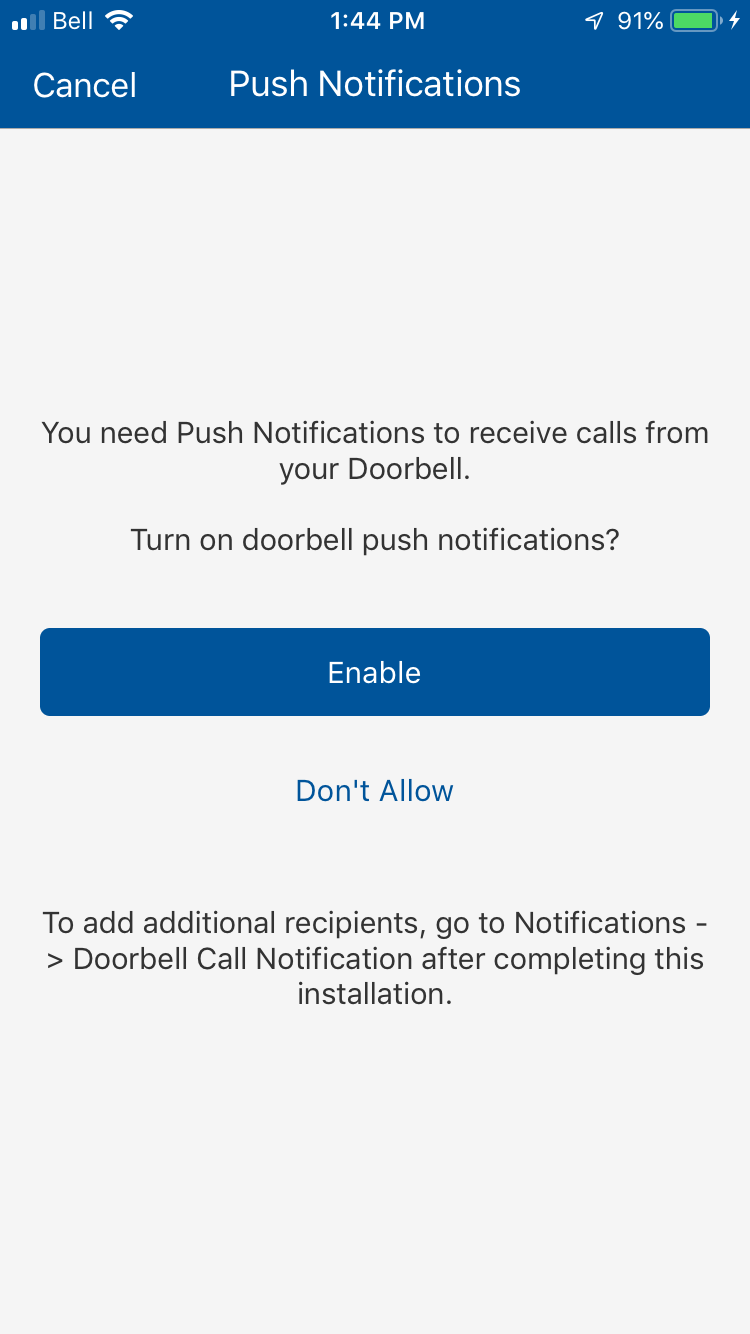
- A configuration message will appear. Tap Enable.
- Enable Doorbell Call.
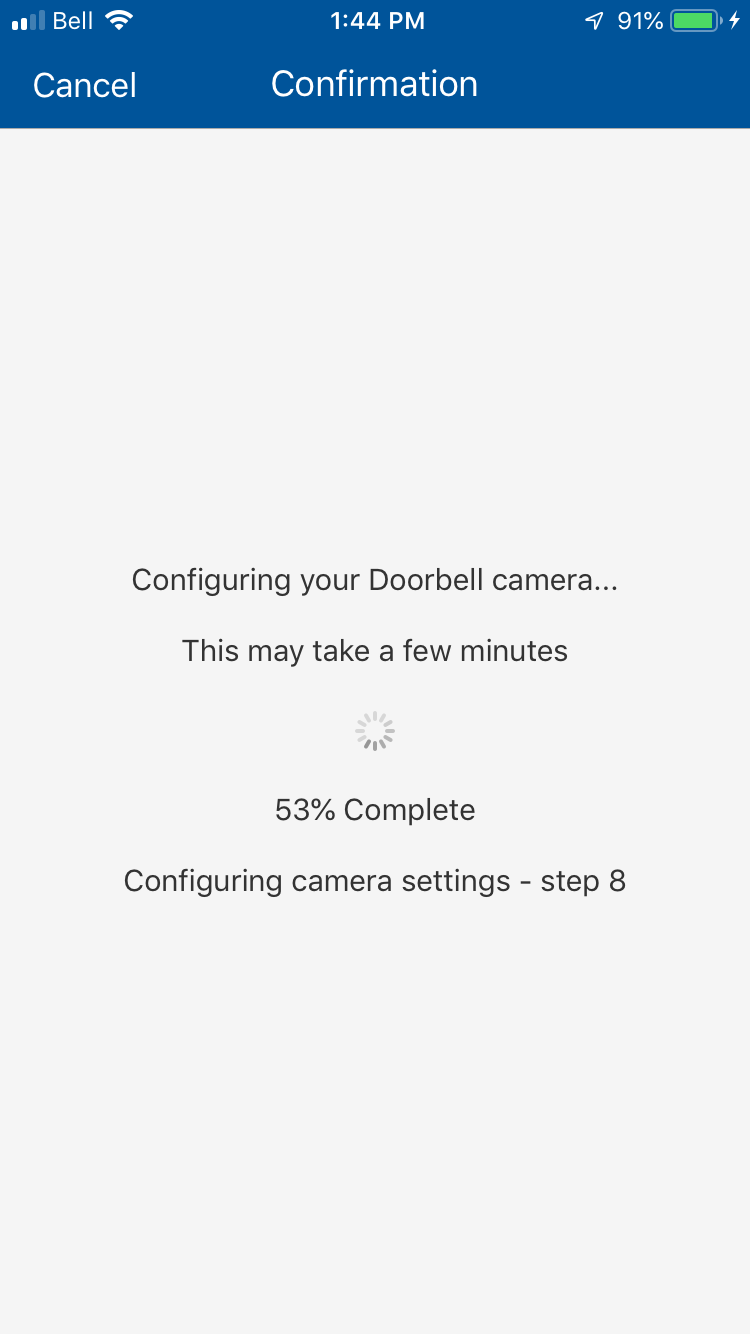
- A "Success" message appears on the screen.
- Tap Done. Your doorbell is ready to use.