To verify mail settings in Outlook 2010, follow these directions:
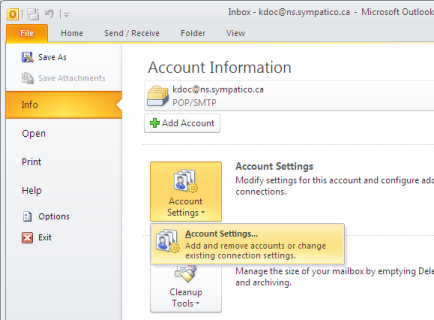
1. Click on File, Account Settings button, then select Account Settings.
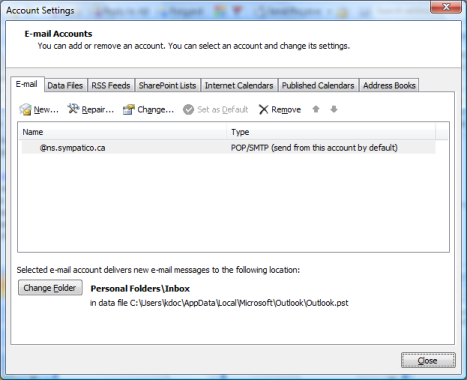
2. Within the Email Accounts screen, select the Account that you wish to verify, then click on Change
3. Under the Servers tab, the following information should be entered;
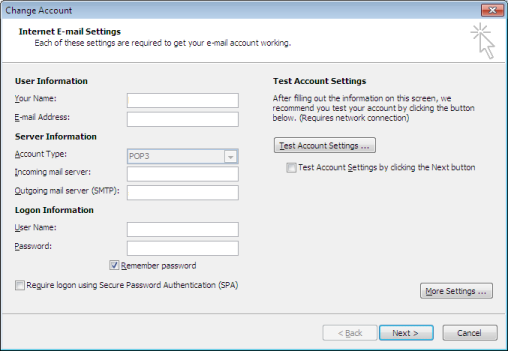
If the customer is roaming, and is connected to the Bell Aliant Network, they MUST use the Bell Aliant Outgoing Mail server (smtp.bellaliant.net) to successfully send mail.
If the customer is using an alternate service provider - but using a Bell Aliant Email account - they will have to use the Outgoing mail server of the Alternate Service provider.
For Example, a customer visiting from Montreal, with an Outgoing Mail server of smtp1.montrealbusiness.ca, MUST use Bell Aliant's Outgoing mail server (smtp.bellaliant.net). Remind them that when they return home it must be changed back. There is no need to change the incoming (POP) entry.
If the customer notices that their email setting have changed to 127.0.0.1 we can (1) leave the server settings this way as long as it working properly - this can happen if the customer installs some Anti Virus applications, or (2) we can change the server settings back to the proper settings, and disable the Email virus scanning
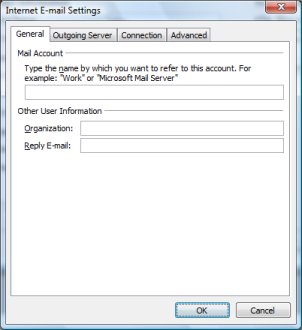
4. From within the Generals tab, the Mail Account section should have a description of the mail account (EX: Sympatico, or Billy's Email), Organization can be left blank. Enter the customer's Email address in the Reply Email field. Click on the Outgoing Server tab
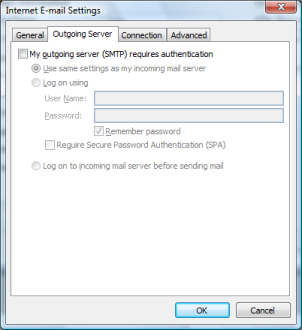
5. The Outgoing Server tab should be configured as the image below, click the Connection tab.
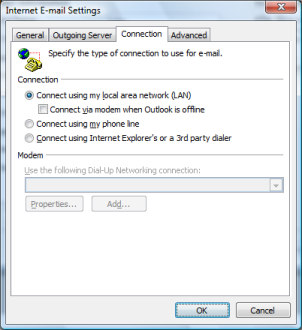
6. Ensure that the connection type is properly configured to the type of Internet connection being used. Click on the Advanced tab.
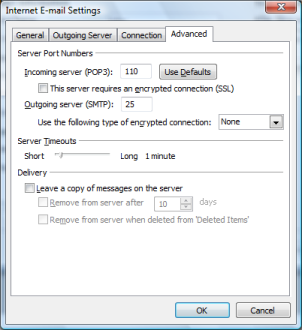
7. Ensure that the Advanced tab is configured as in the image below, click OK to return to the Email Accounts window. The screen shot below is for an account configured as POP3, if configured as IMAP, the Incoming server (IMAP) port would be 143.
8. Click on Next
9. Click on Finish